Installation:
Unzip the 2MGT_Auralis.zip file anywhere on your computer.
Launch the application.
1. Configure Audio Settings:
Click the "#1" button in the upper left corner of the "Audio Settings". Select the desired wave-device for playback.
Buffer Size: If you select a buffer-size which is too low you will experience a "crackling" sound. The buffer-size settings depends on the performance of the sound-card.
For sample Rates of 44100 or 48000 Hz, A Buffer size of 1024 samples should be fine.
To access the Audio Settings anytime press Ctrl+A.
If you need to make ASIO settings, then use the shortcut keys:
ASIO Control Panel Ctrl+S
Select the used ASIO I/O Channels Ctrl+D
2. Turn off the buttons 2 > 3 > 4 > 5 one by one
3. If the program window is cropped, press the keyboard shortcut Ctrl + Z
4. Exit the program and restart
With each subsequent launch of the application, the sound tables will be loaded. It will take some time to load sound tables. The signal level indicator (around the Start button) will one flashing when the tool is ready.
5. Click the "Start" button.
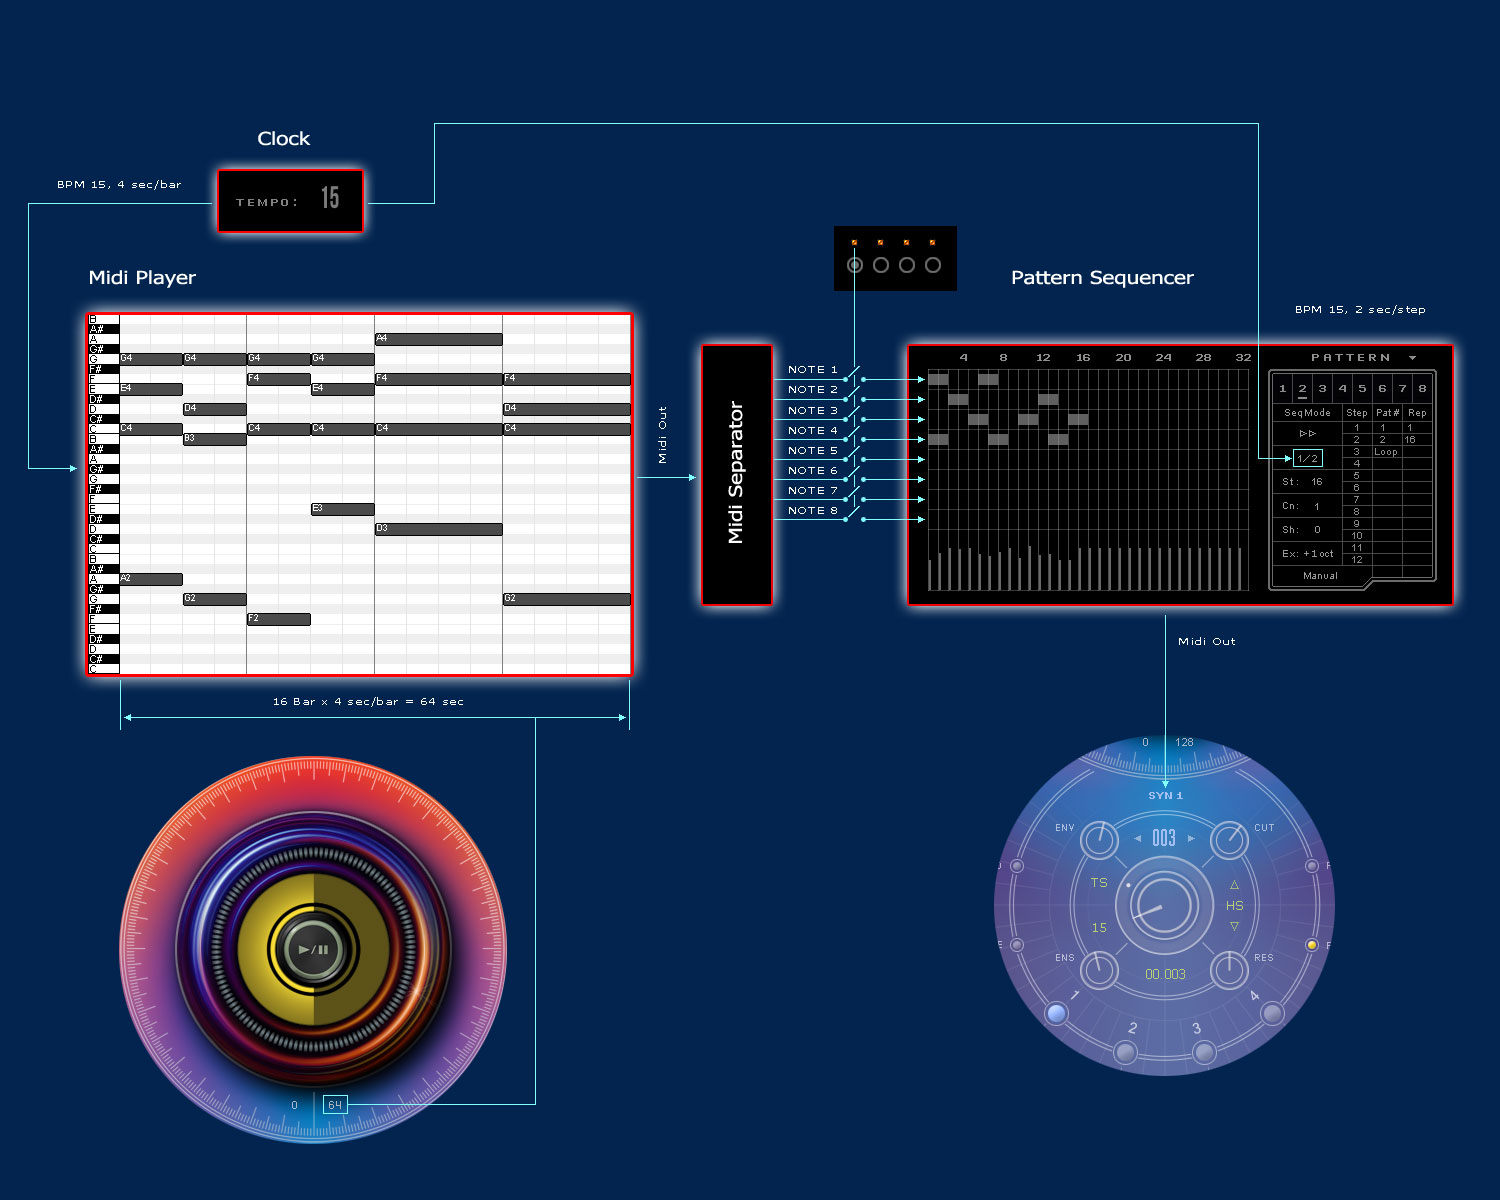
This diagram will help understand how the Auralis works.
MIDI settings can be called up by pressing the Ctrl+M shortcut keys.
You can set MIDI automation by Right-clicking on most Knob (From the left side) controls and choosing Learn, Unlearn or Edit. The Edit assignment allows you to manually set the controller. For the time being, only Midi Automation CC can be transmitted via the MIDI channel (manage some knobs and buttons.. for example, the start button and layer levels).